
Three-Body Problem Simulation
Create simulations of the Three-Body problem and download the animation videos
This is an online simulation of the Three-Body problem.
The Three-body problem is a famous problem in physics and classical mechanics that involves predicting the motion of three celestial bodies interacting with each other gravitationally.
In this simulation, you can set the initial positions and velocities of each body and watch their trajectories. You can customize parameters of the simulation, including the gravitational constant and gravitational softening. You can also customize the visualization by choosing the trajectory length, body colors, lights, glow effects and more. To learn more about each configuration parameter, read the documentation below.
You can also select the initial conditions from known special-case solutions, including the Figure-8 orbit and Broucke periodic solutions.
While watching the simulations, you can pan, zoom, change animation speed and customize visualization configurations. Move the camera by clicking and dragging your mouse on the canvas. Zoom by scrolling the mouse wheel on the canvas. You can also use the buttons to pause, resume and restart the simulation.
This tool also allows you to create simulations with more than 3 bodies. In this case, they are n-body problem simulations. To do that, edit the field "number of bodies" with the desired number and set the initial positions and velocities of each body.
You can also record and download videos of your simulations. The simulation videos will be generated using webm extension. You are free to share the generated videos on YouTube, TikTok or any other social media or website. Attribution is not required but appreciated.
Elapsed time: 0 ms
Examples
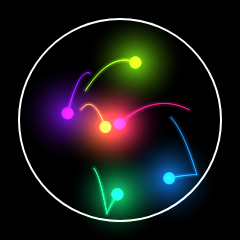
Below you can find some examples of initial configurations of the Three-Body problem. Click on any example to apply the initial configuration and start the simulation.
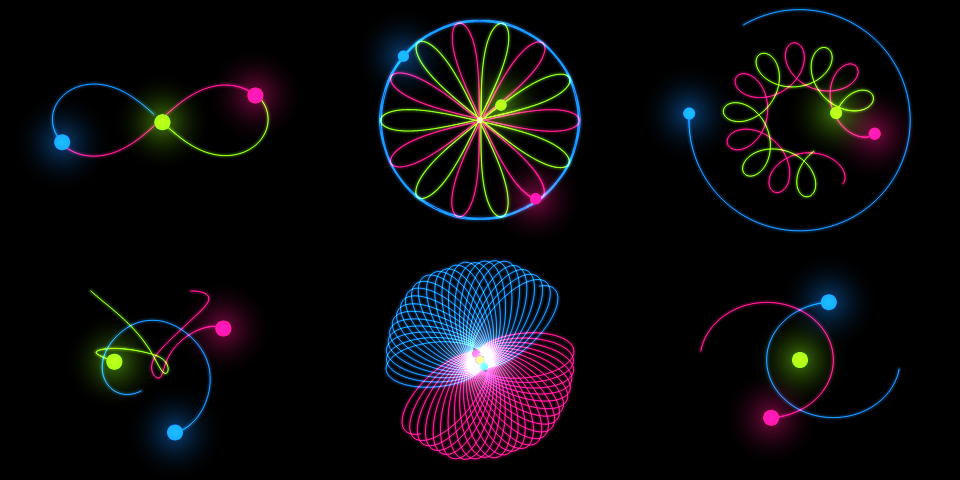
Example #1
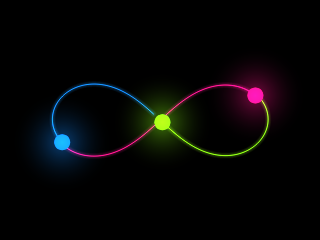
This is an example of the figure-8 orbit.
Example #2
Broucke A 2
Example #3
Broucke A 11
Example #4
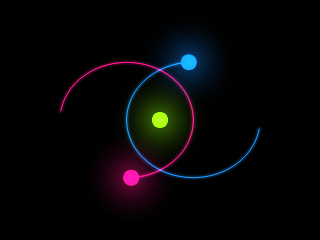
This is an example of a stable configuration, where the body at the center (green) remains static.
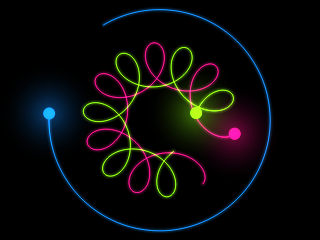
Example #5
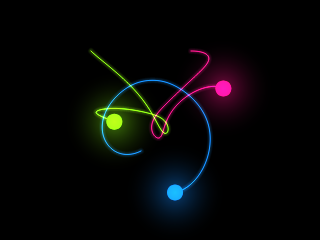
This is an example of chaotic motion. Bodies get slingshot after a long time.
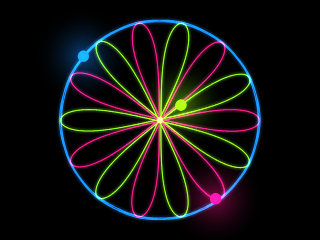
Example #6
In this example, the trajectories build a drawing similar to a spirograph.
Configuration parameters
Canvas size
| Field | Description |
|---|---|
| Resolution | The canvas width and height, in pixels. You can select an option from the list of commom display resolutions, or use "custom" to choose any width and height. |
| Width | The width of the animation canvas, in pixels. |
| Height | The height of the animation canvas, in pixels. |
Initial conditions
| Field | Description |
|---|---|
| Number of bodies | The number of bodies for each simulation. For the three body problem, use 3. But you can also create simulations with more bodies (n-body problem simulations) by choosing the desired number in this field. |
You can configure the initial condition of each body, including the initial position, initial velocity and mass.
| Field | Description |
|---|---|
| Position x | Initial x coordinate of the body. |
| Position y | Initial y coordinate of the body. |
| Speed x | Initial horizontal velocity of the body. |
| Speed y | Initial vertical velocity of the body. |
| Mass | Mass of the body. |
Constants
| Field | Description |
|---|---|
| Gravitational constant | The gravitational constant. Greater values will cause bodies to attract each other with greater force. |
Gravitational softening
| Field | Description |
|---|---|
| Gravitational softening length | Gravitational softening is a numerical trick to avoid unrealistic motion of bodies caused by too close encounters. It must be a number between 0 and 100. |
Visualization
In this section you can configure how you want to visualize the simulation, including some nice effects.
Trajectory
| Field | Description |
|---|---|
| Show trajectory | If enabled, the simulation will show the body trajectory (trail). |
| Trajectory length | The body trajectory length, in animation frames. You should avoid setting very large trails because it may cause the simulation to become slow. |
| Trajectory width | The width of the trajectory, in pixels. |
| Glow trajectory | If enabled, the trajectory will have a glow effect (neon). |
| Glow width | If the glow trajectory is enabled, this will set the width of the glow. |
Bodies
| Field | Description |
|---|---|
| Show bodies | If enabled, the simulation will render the bodies (as circles). You can disable this option if you only want to see the body trajectory, for example. |
| Body radius | The radius of the bodies. |
| Body color generation | This option set how the color of the bodies will be generated. It can be a different color for each body or a different color for each simulation (if you enable the "chaos visualization" option). |
| Connect bodies | If enabled, the bodies will be connected with a line. This line don't affect the simulation physics, only the visualization. |
Lights
| Field | Description |
|---|---|
| Show lights | If enabled, the bodies will have a light effect, similar to glow or neon. |
| Light intensity | The intensity of the light effect. |
| Light radius | The radius of the light effect. |
Chaos visualization
The "chaos visualization" is an interesting and unique feature of this online tool. It allows you to render multiple simulations in a single animation or video. This works by making multiple independent simulations in parallel, and joining them together by combining each simulation as a layer in the resulting animation frames.
I call it "chaos visualization" because it allows you to visualize the effect that small changes in initial conditions cause in the simulation over time.
To enable the chaos visualization, just set the field "number of simulations" to a value grater than 1. You need to restart the simulation for this to take effect.
| Field | Description |
|---|---|
| Number of simulations | The number of simultaneous visualizations of the simulations. Each simulation will tipically have a small change in the initial position of one or more bodies. You can configure these offsets (see table below). These changes in the initial positions cause increasing differences in the positions over time, that you can visualize in this online tool. Large number of simulations can cause the animation to become slow. However, you can record videos using this online tool, so that the generated videos will keep the configured framerate. The generated videos will always have the configured framerate, even if the recording process takes too long. |
If you enable chaos visualization (by setting the number of simulations to a value greater than 1), you can configure the fields "offset x" and "offset y" for each body. At least one of the bodies must have offset x or offset y different than zero, otherwise you will not be able to see the differences in the trajectories.
| Field | Description |
|---|---|
| Offset x | The change in the horizontal position of the body, for each simulation. For example, if the "position x" is set to 100 and the "offset x" is set to 1, the initial x coordinate of the bodies will be 100, 101, 102, 103 and so on. |
| Offset y | The change in the vertical position of the body, for each simulation. For example, if the "position y" is set to 100 and the "offset y" is set to 1, the initial y coordinate of the bodies will be 100, 101, 102, 103 and so on. |
Coordinates
| Field | Description |
|---|---|
| Origin | The coordinates origin (0,0). Can be "top left" or "center". |
| Offset x | The "x" coordinate offset, in pixels. It determines the horizontal position of the "camera". Adjusting this offset lets you shift the view or "move" the camera. |
| Offset y | The "y" coordinate offset, in pixels. It determines the vertical position of the "camera". Adjusting this offset lets you shift the view or "move" the camera. |
| Adjust coordinates automatically | If enabled, the camera will automatically center in the average position of the bodies. The "offset x" and "offset y" will be automatically updated during the simulation. |
Zoom
| Field | Description |
|---|---|
| Zoom | Changing this parameter allows you to "zoom in" or "zoom out". |
| Adjust zoom automatically | If enabled, the camera will automatically zoom to fit all the bodies. If you enable automatic zoom, the option "adjust coordinates automatically" will also be enabled. |
| Min zoom | The minimum zoom, when the automatic zoom is enabled. |
| Max zoom | The maximum zoom, when the automatic zoom is enabled. |
Grid
| Field | Description |
|---|---|
| Show grid | Enables or disables the background grid. When enabled, horizontal and vertical lines will be displayed across the background. |
| Cell size | Defines the width and height of each grid cell. The cell size scales automatically when zooming in or out. |
| Min scaled cell size | Specifies the smallest allowed size for grid cells after scaling. If the scaled cell size becomes smaller than this value, it will be multiplied by 10 until it exceeds the minimum. If the scaled cell size becomes larger than 10 times this value, it will be divided by 10 until it is within the acceptable range (less than 10x the minimum). This prevents the grid cells from becoming too small or too large when zooming. |
Background
| Field | Description |
|---|---|
| Transparent background | If this option is checked, the animation will have transparent background. |
| Background color | The background color, in hexadecimal value. For example, use #000000 for a black background. |
Audio
| Field | Description |
|---|---|
| Play audio | If this option is checked, each body will emit a sound, based on the body movement speed. Faster bodies produce audio with a higher pitch, while slower bodies produce audio with a lower pitch. |
| Volume | The volume of the audio. |
| Waveform | The audio is generated using oscillators. In this option you can choose the waveform of the oscillators. It can be sine, square, triangle or sawtooth. |
| Frequency multiplier | The bodies will produce an audio. The audio frequency is calculated by multiplying the body speed by this frequency multiplier. |
Animation speed
| Field | Description |
|---|---|
| Animation speed | The speed of the animation. Values greater than 1 means the animation will play in "fast motion". |
Animation control
| Button | Description |
|---|---|
| Start | Start the simulation. |
| Restart | Restart the simulation. |
| Pause | Pause the simulation. |
| Resume | Resume the simulation. |
| Stop | Stop the simulation. |
During the simulations, you can download the current animation frame at any time.
| Button | Description |
|---|---|
| Download current animation frame | Download current animation frame (in PNG format). |
Generate and download video
Instead of only watching the simulations online, you can also record and download videos of your simulations. The simulation videos will be generated using webm extension.
You are free to share the generated videos on YouTube, TikTok or any other social media or website. Attribution is not required but appreciated.
| Field | Description |
|---|---|
| Framerate | The amount of frames per second that you want the video to have. |
| Automatically stop after... | If enabled, the video recording will stop automatically after the configured time (in seconds) or after the configured amount of frames. |
Related tools